How to Setup macOS in a VM on macOS with UTM
If you're a developer—or just curious about new macOS releases—this guide also works great for testing beta versions of macOS (like the newly released macOS 26 "Tahoe") inside a VM. It's a safe way to explore without touching your main system. See the bottom of this guide for instructions on enabling beta updates after setup.
- Running Autonomous Agents in Isolated macOS Environments
- How to install macOS in UTM
- Enabling Beta Versions of macOS in Your VM
- Lessons Learned
Running Autonomous Agents in Isolated macOS Environments
Lately I’ve been experimenting with a range of autonomous agents, some of which run locally on my Mac. To keep these processes sandboxed, I’ve started isolating each one in its own containerized environment. One of the main reasons I started isolating agents in VMs is that they sometimes hijack the mouse and keyboard—making my system nearly unusable while they're running. When I need to run something on macOS in isolation, UTM has been the simplest way to set up a lightweight macOS virtual machine. Just a heads-up: it only works on Apple Silicon.
UTM wraps around QEMU (a powerful, open-source emulator) but hides most of the complexity. You also have the option to use Apple’s Virtualization framework, which tends to run faster and integrates better with Apple Silicon. For macOS VMs, that’s what I use.
What I like about this setup is how quick it is to get started. UTM can boot from an existing macOS recovery partition, which means you don’t have to track down an installer unless you really want or need to. You can switch between your main system and a clean VM environment in seconds. It’s fast enough to be practical, and it doesn’t mess with the host.
A note on licensing
Apple allows you to run up to two virtual instances of macOS on a Mac, in addition to the main OS. As long as you’re using an official .app or IPSW installer and staying within that limit, you’re within the bounds of their terms. This seems aimed at supporting developers, researchers, and similar use cases—while also drawing a clear line to prevent anyone from spinning up macOS as a hosted service.
How to Setup macOS in UTM
If you're curious, here’s a quick overview of the setup process using UTM on macOS. The screenshots below show what you'll see along the way:
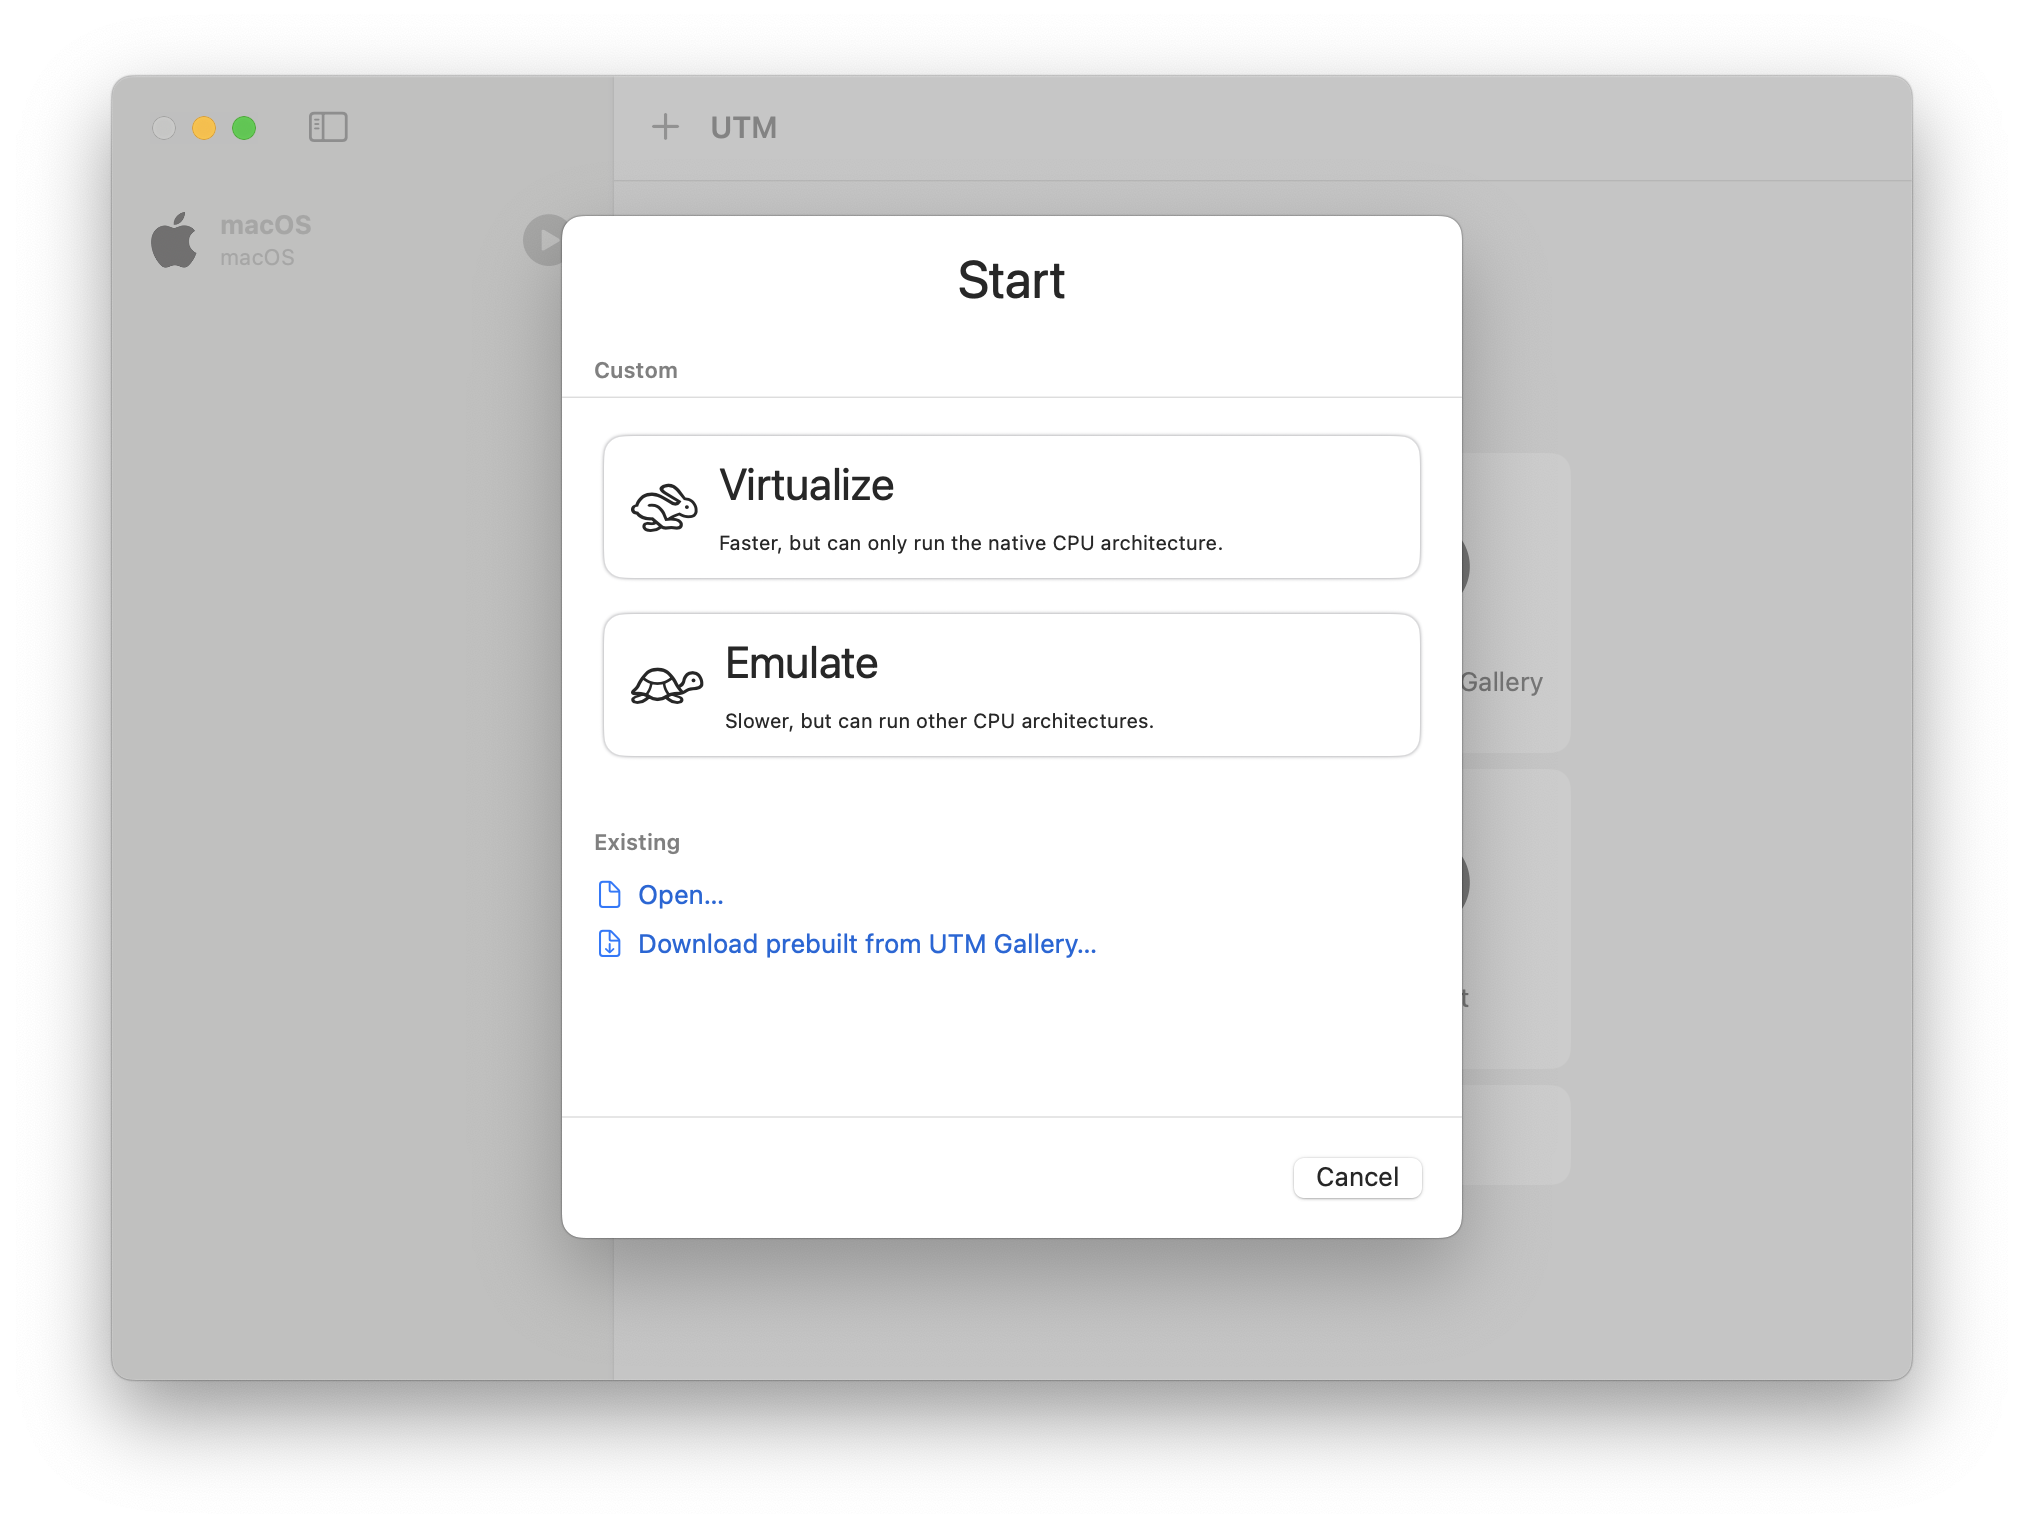
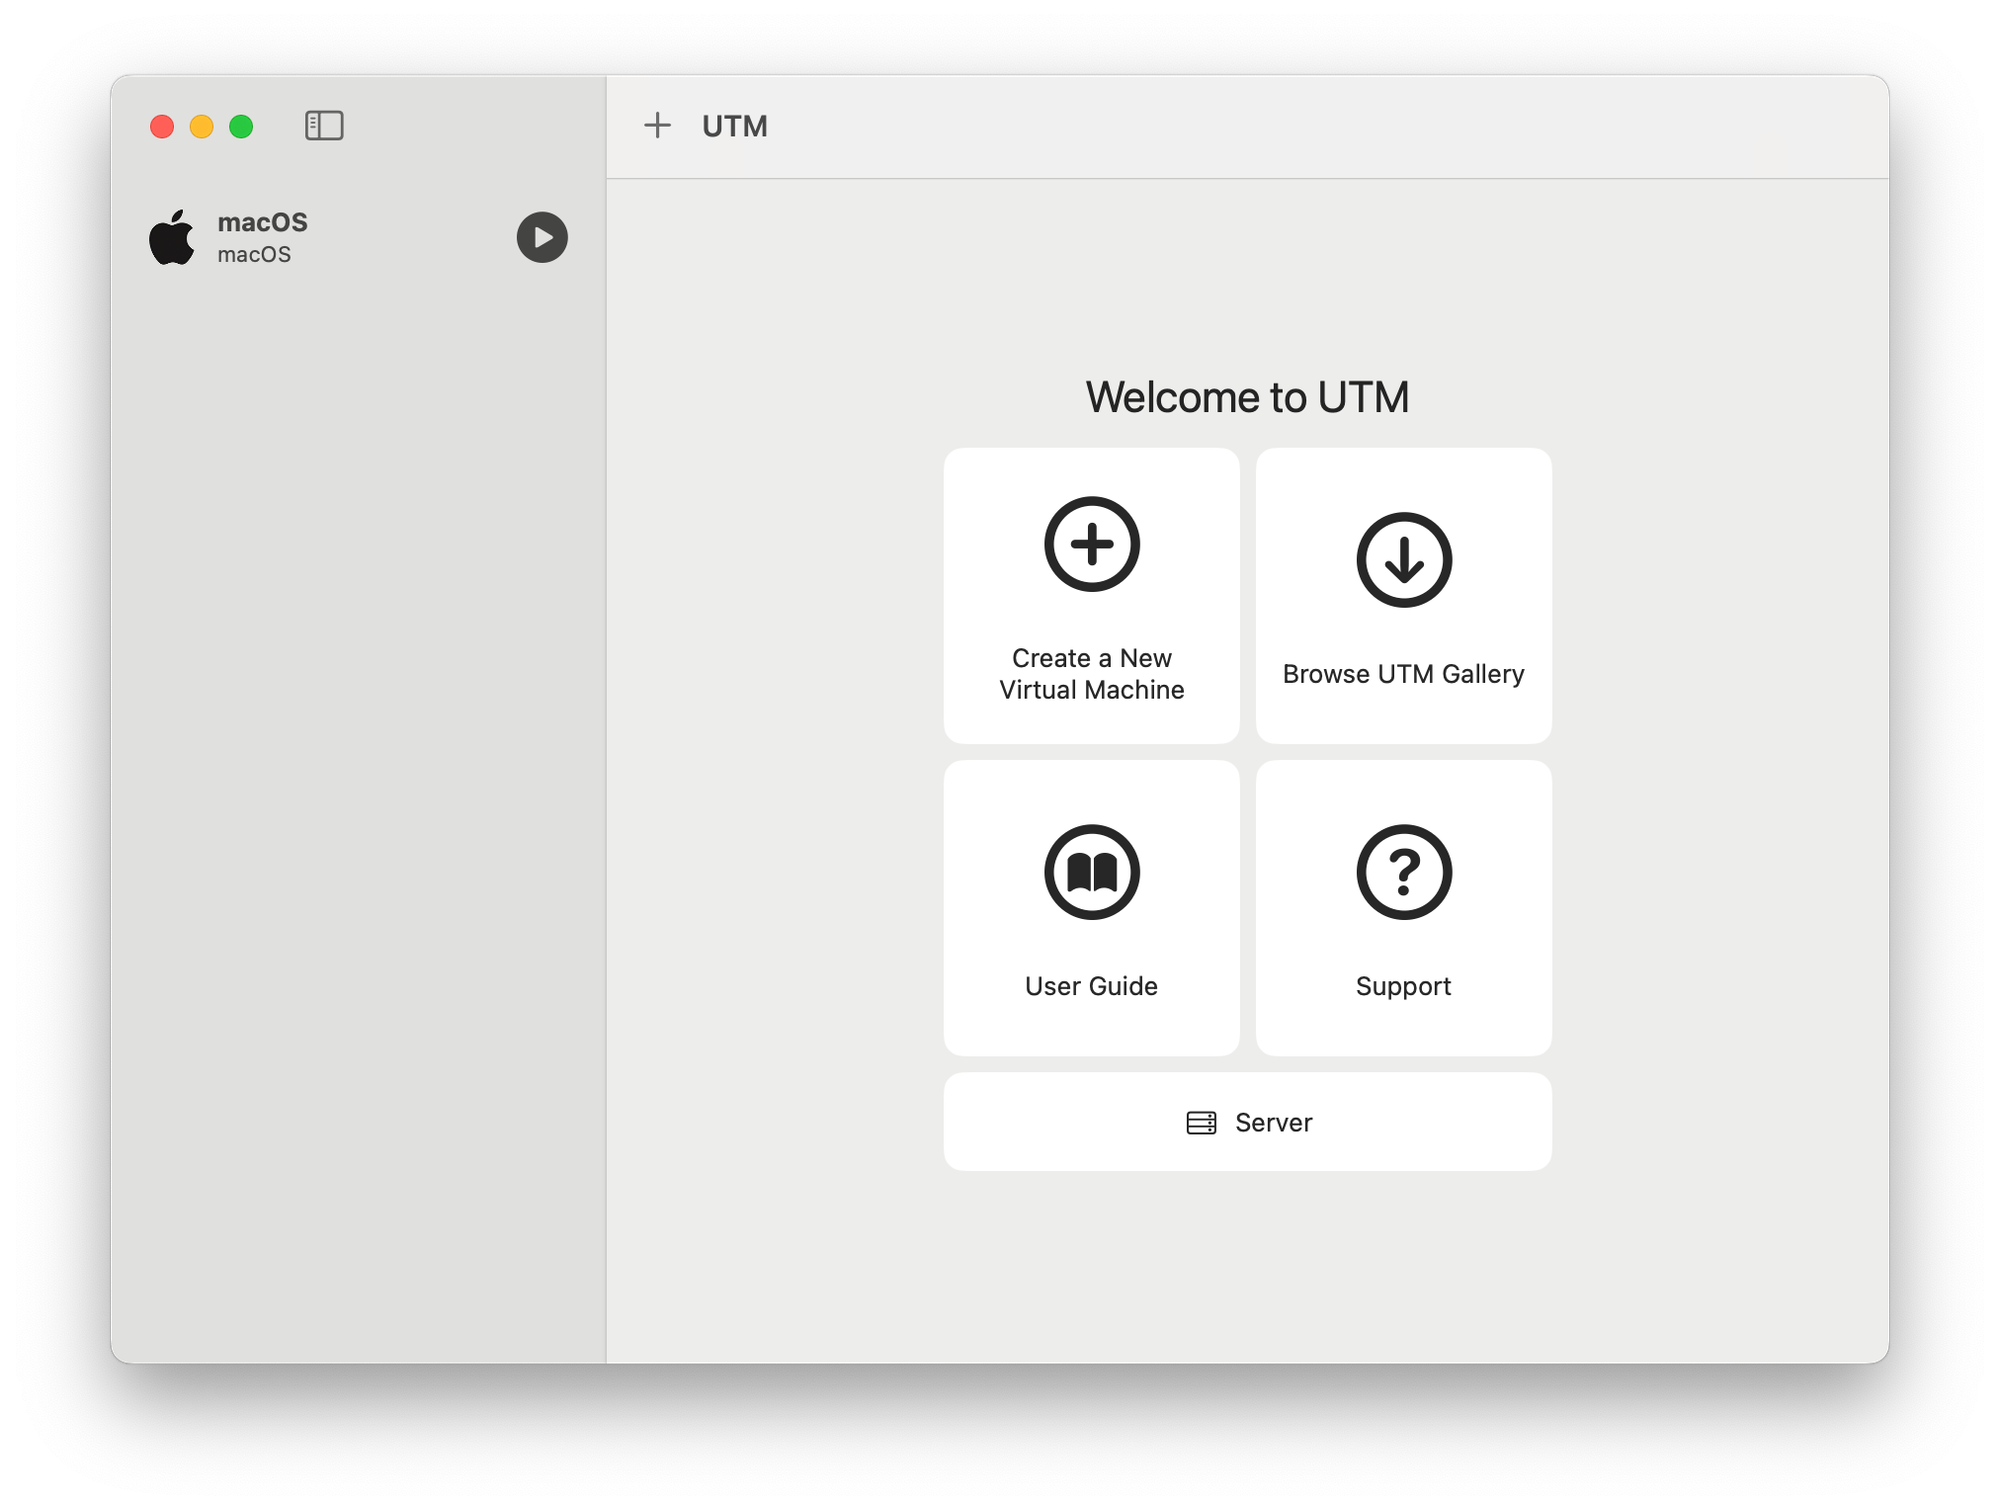
1. Start Screen
When you open UTM and click Create a New Virtual Machine (eg + UTM), you’ll see the choice between Virtualize (for native CPU architecture, faster) and Emulate (for other CPU types, slower). For macOS on Apple Silicon, stick with Virtualize.
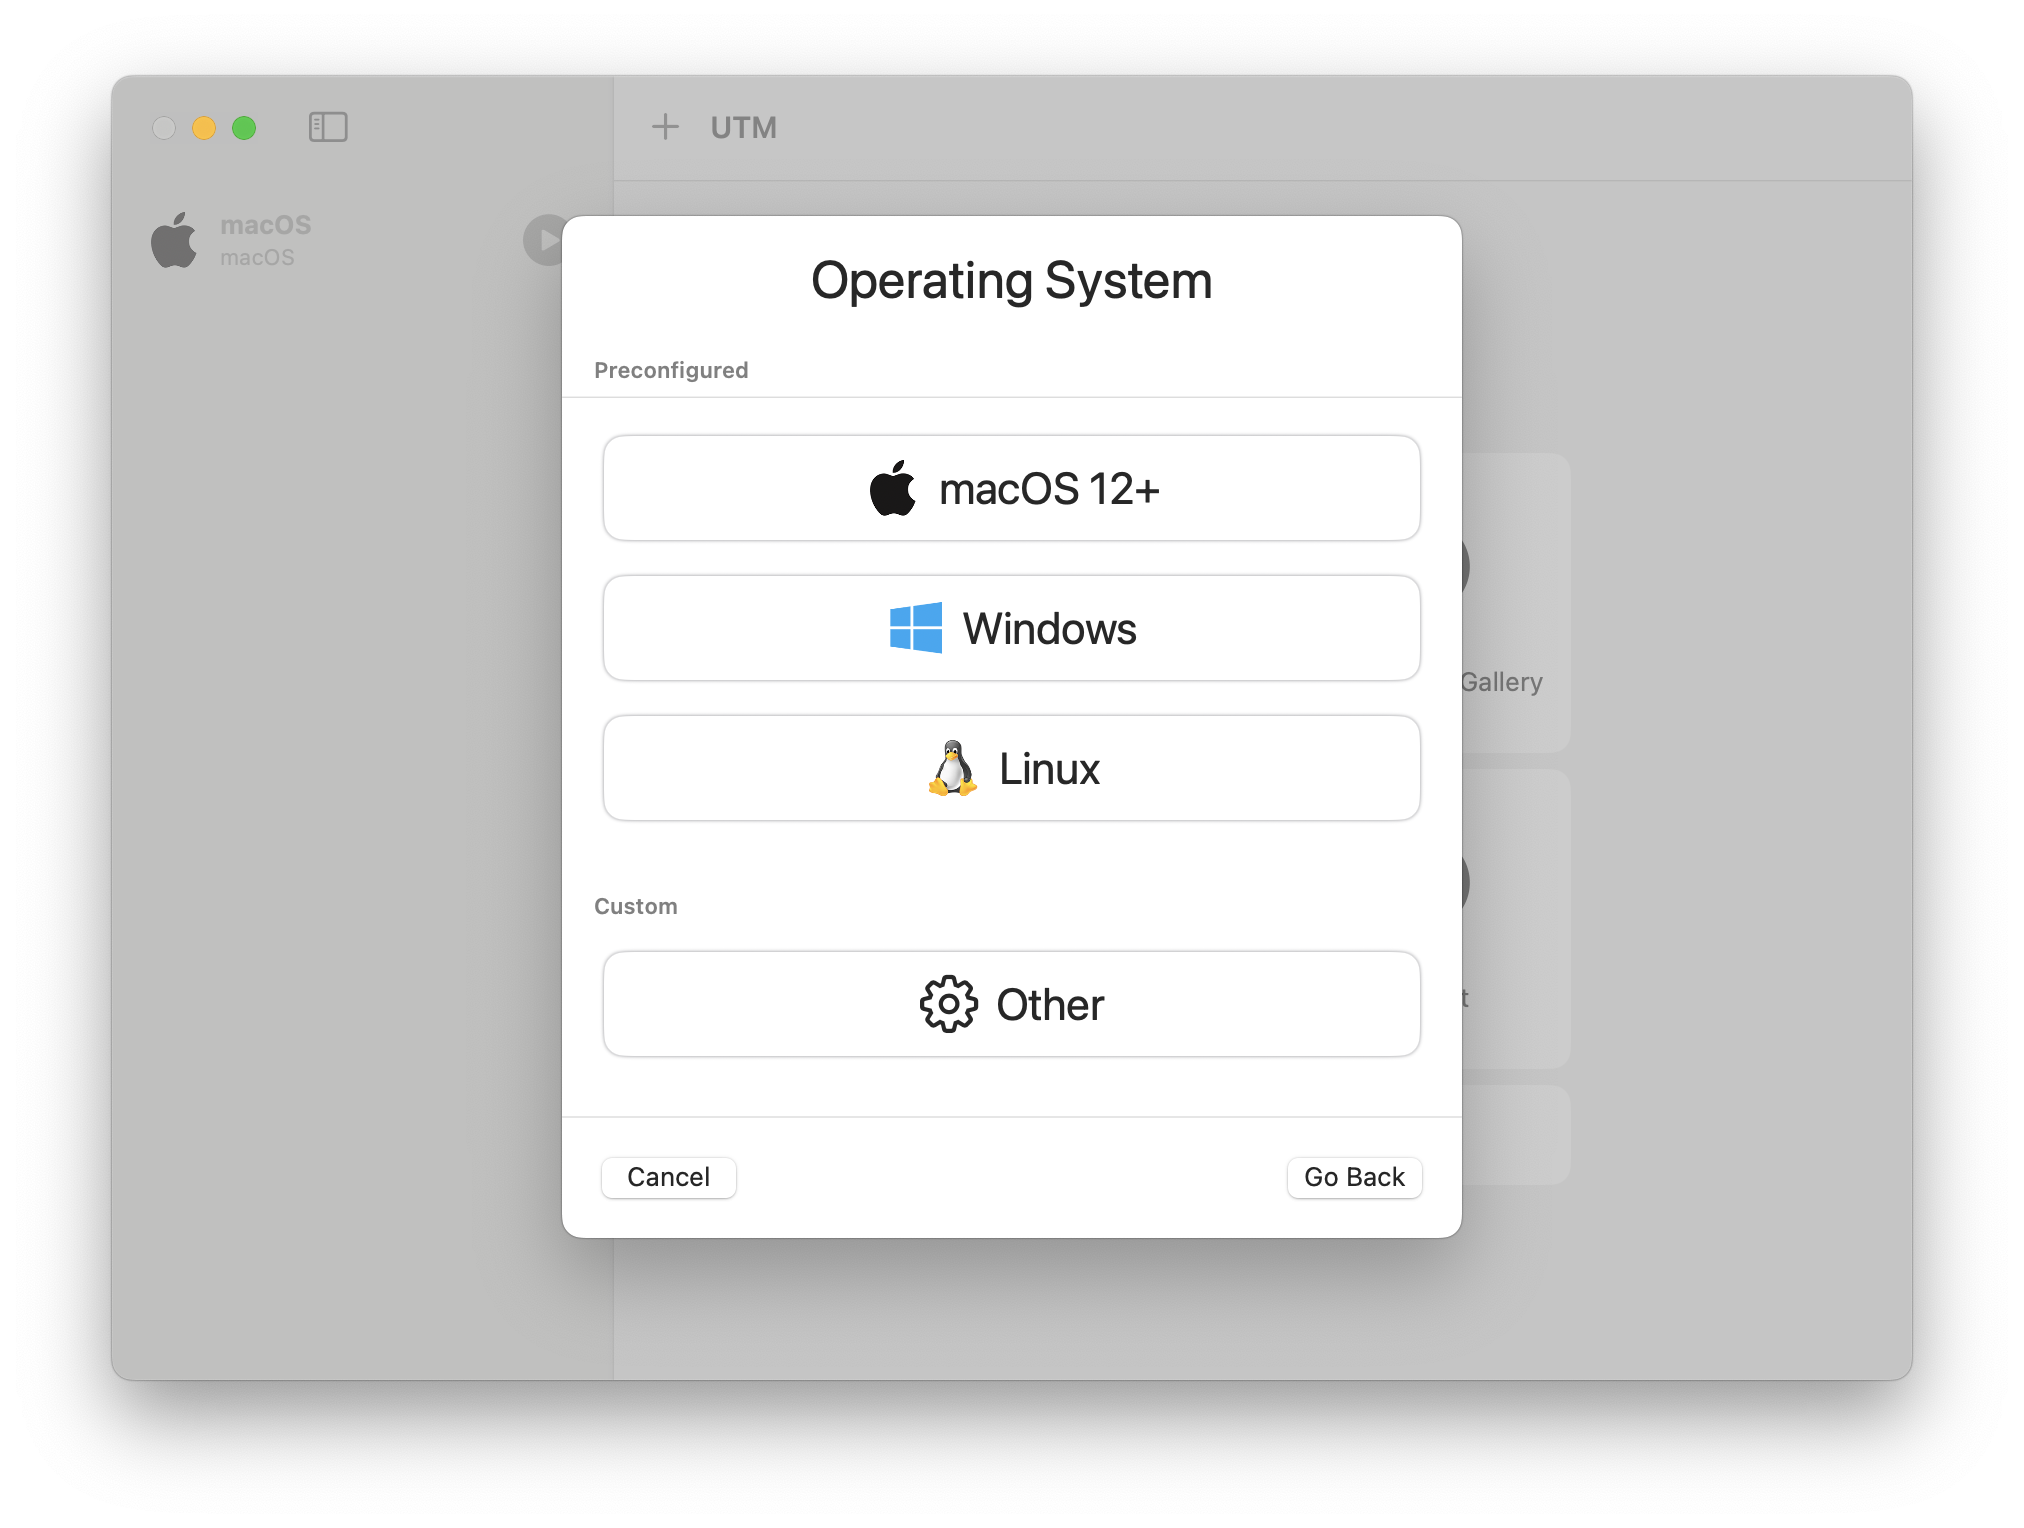
2. Choose the OS
UTM offers preconfigured options. Pick macOS 12+.
3. Import or Download the macOS Installer
Here you can either point to an IPSW file or let UTM fetch it from Apple automatically. If you have the option to continue without selecting a file, UTM will use the installer on your boot partition.
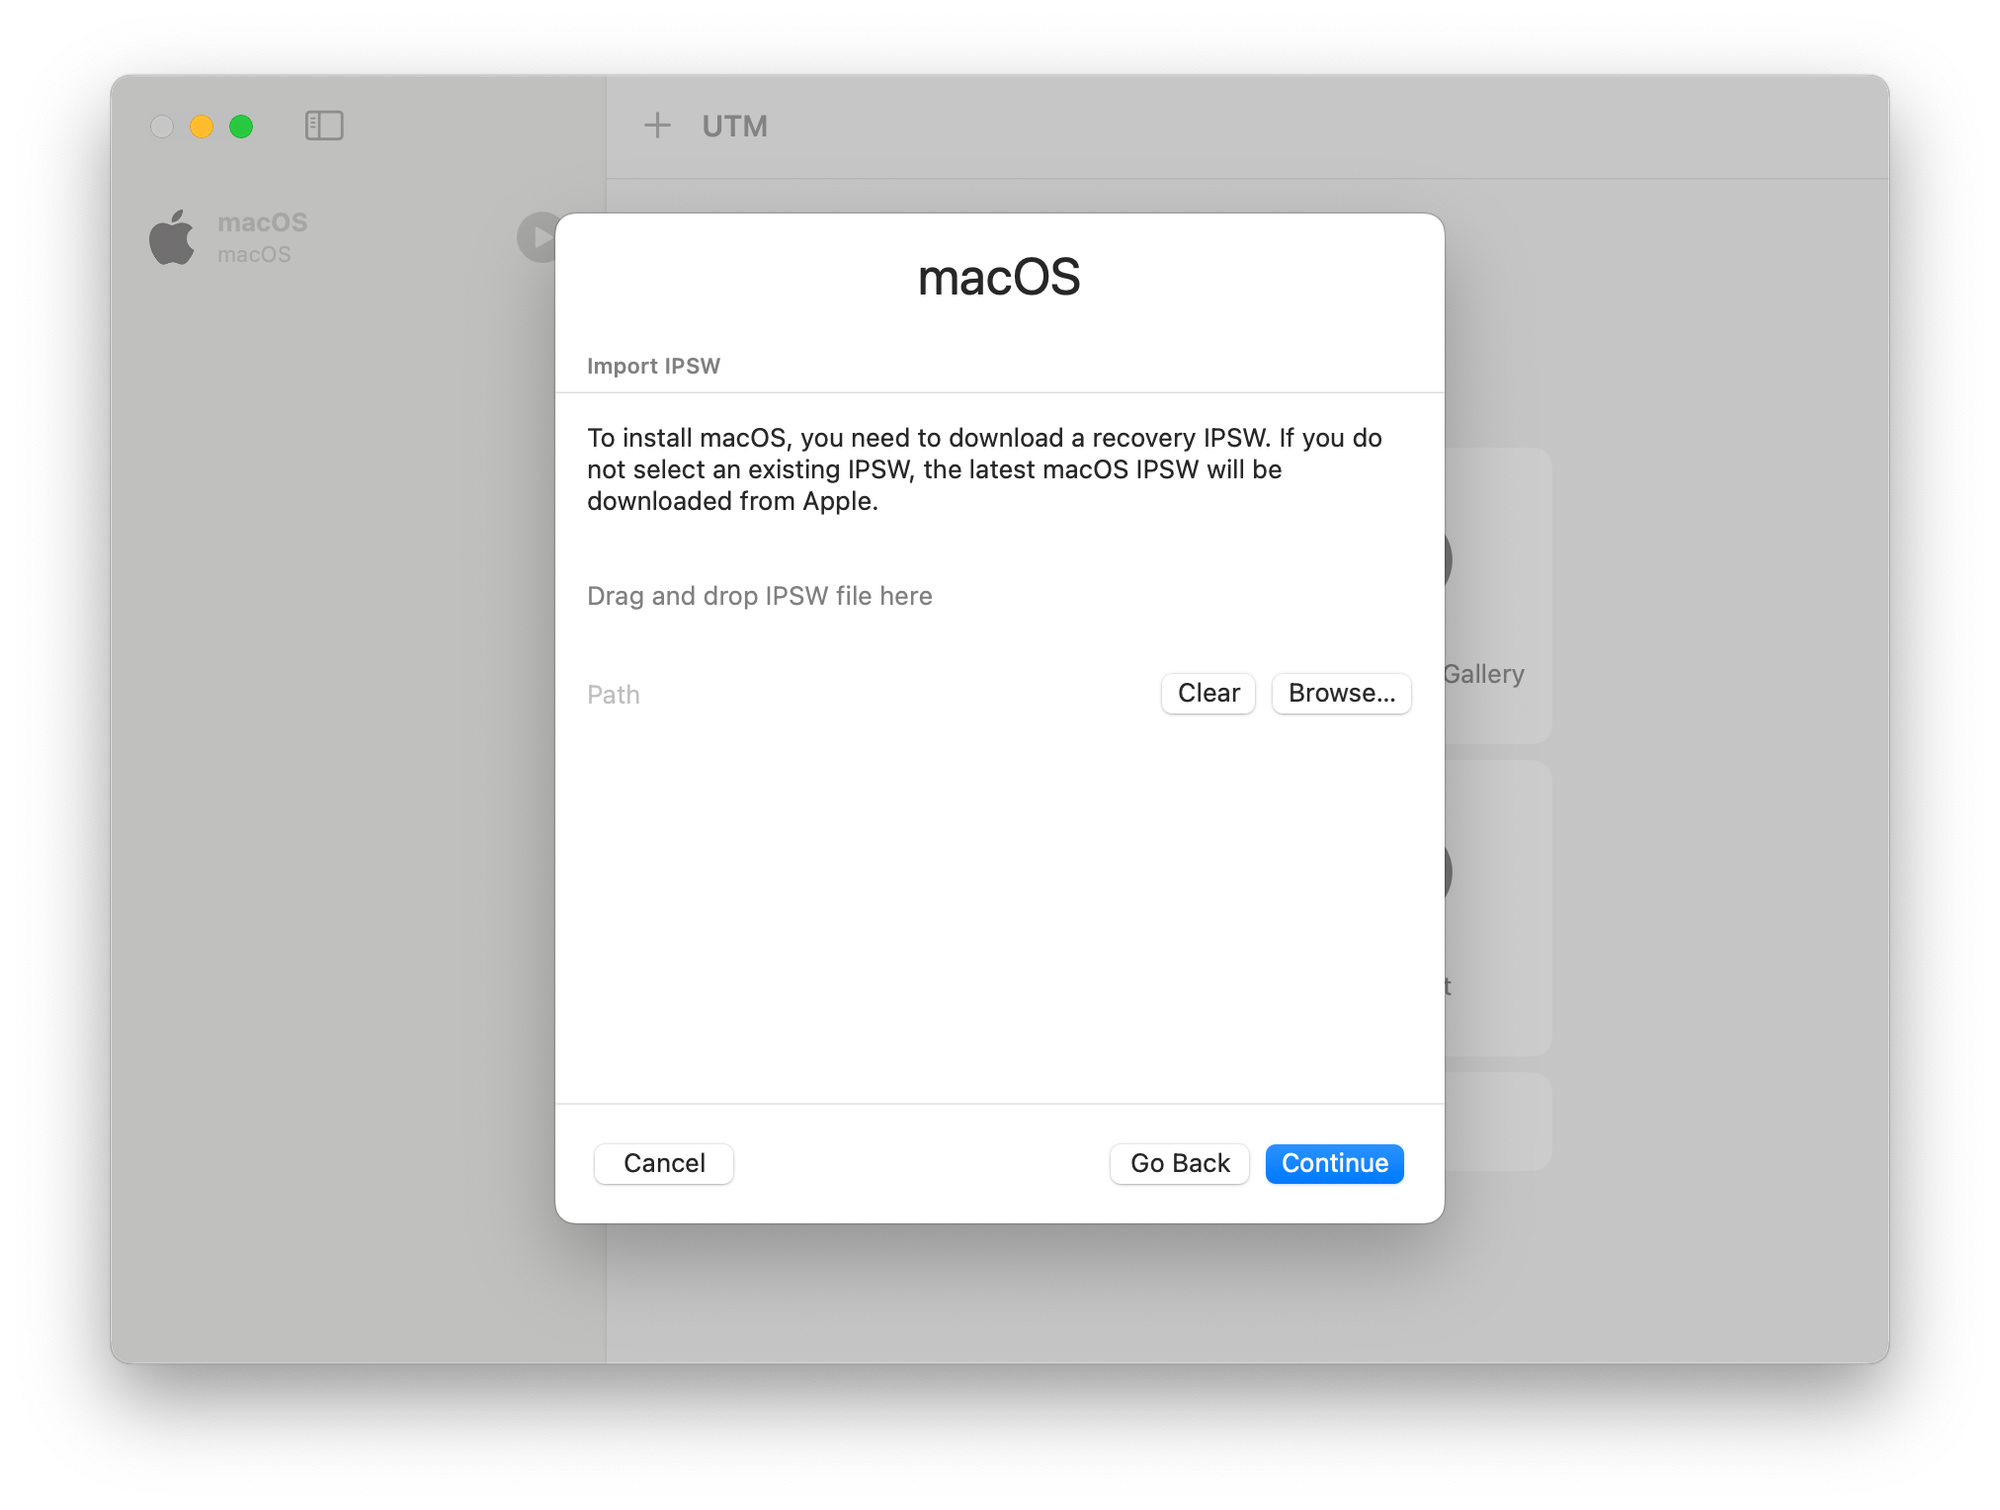
If you want or need an IPSW file, you can look here:https://ipsw.me/product/Mac. These files usually point to Apple’s CDN, but it’s worth double-checking the URL to ensure it hasn’t been hosted and/or potentially modified by a third party.
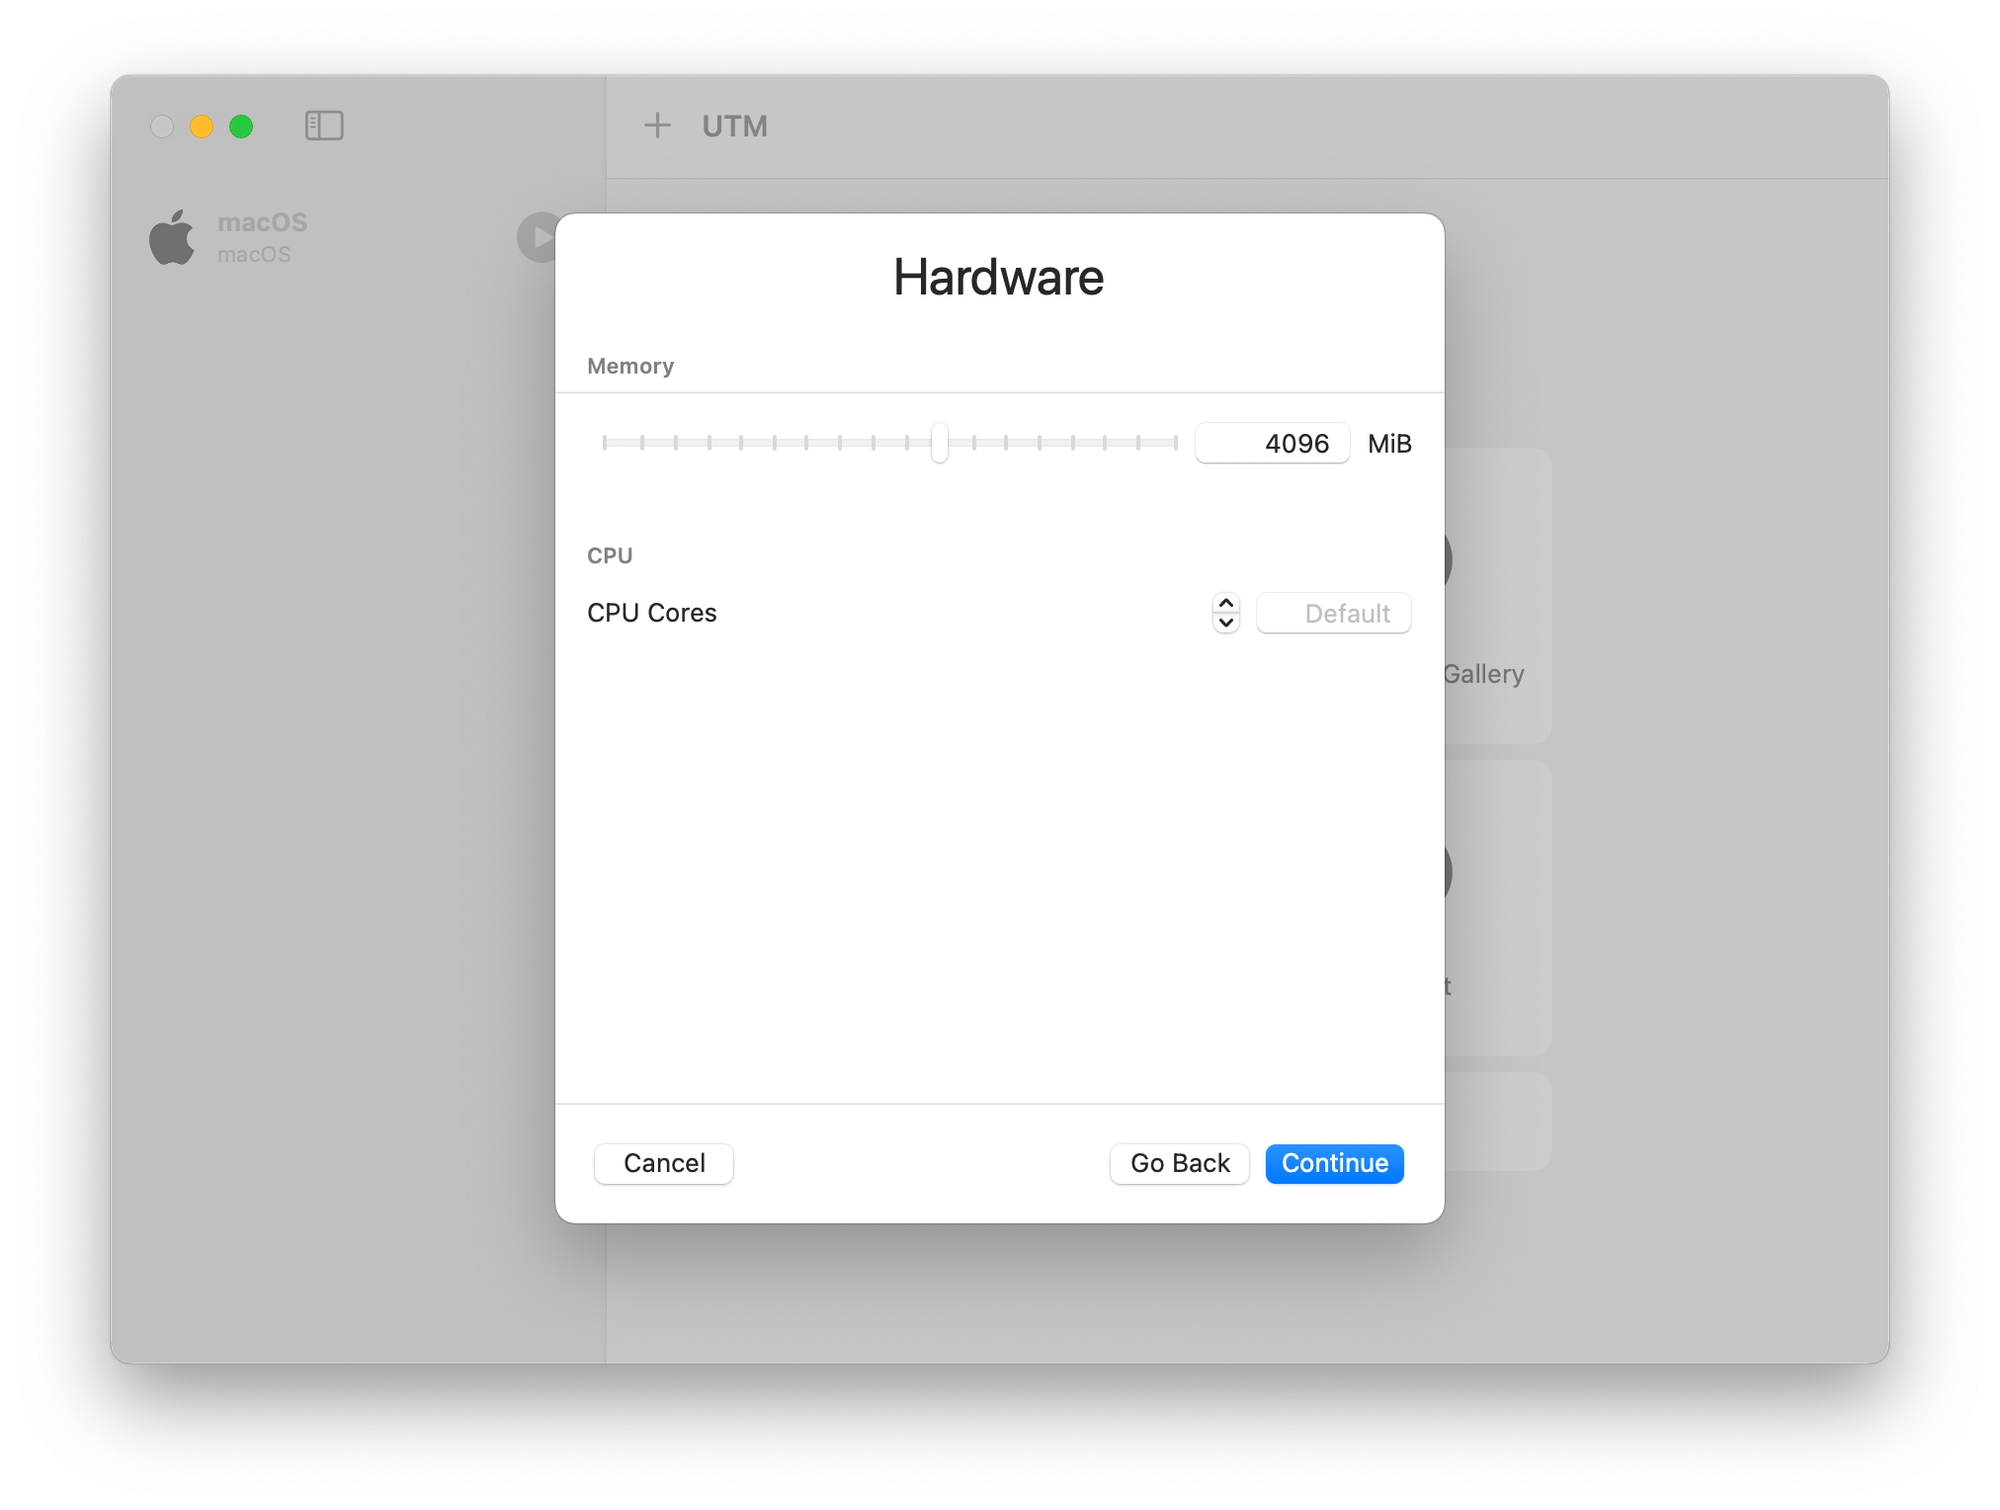
4. Set Resources (RAM and CPU)
This screen lets you assign memory and CPU cores to your VM.
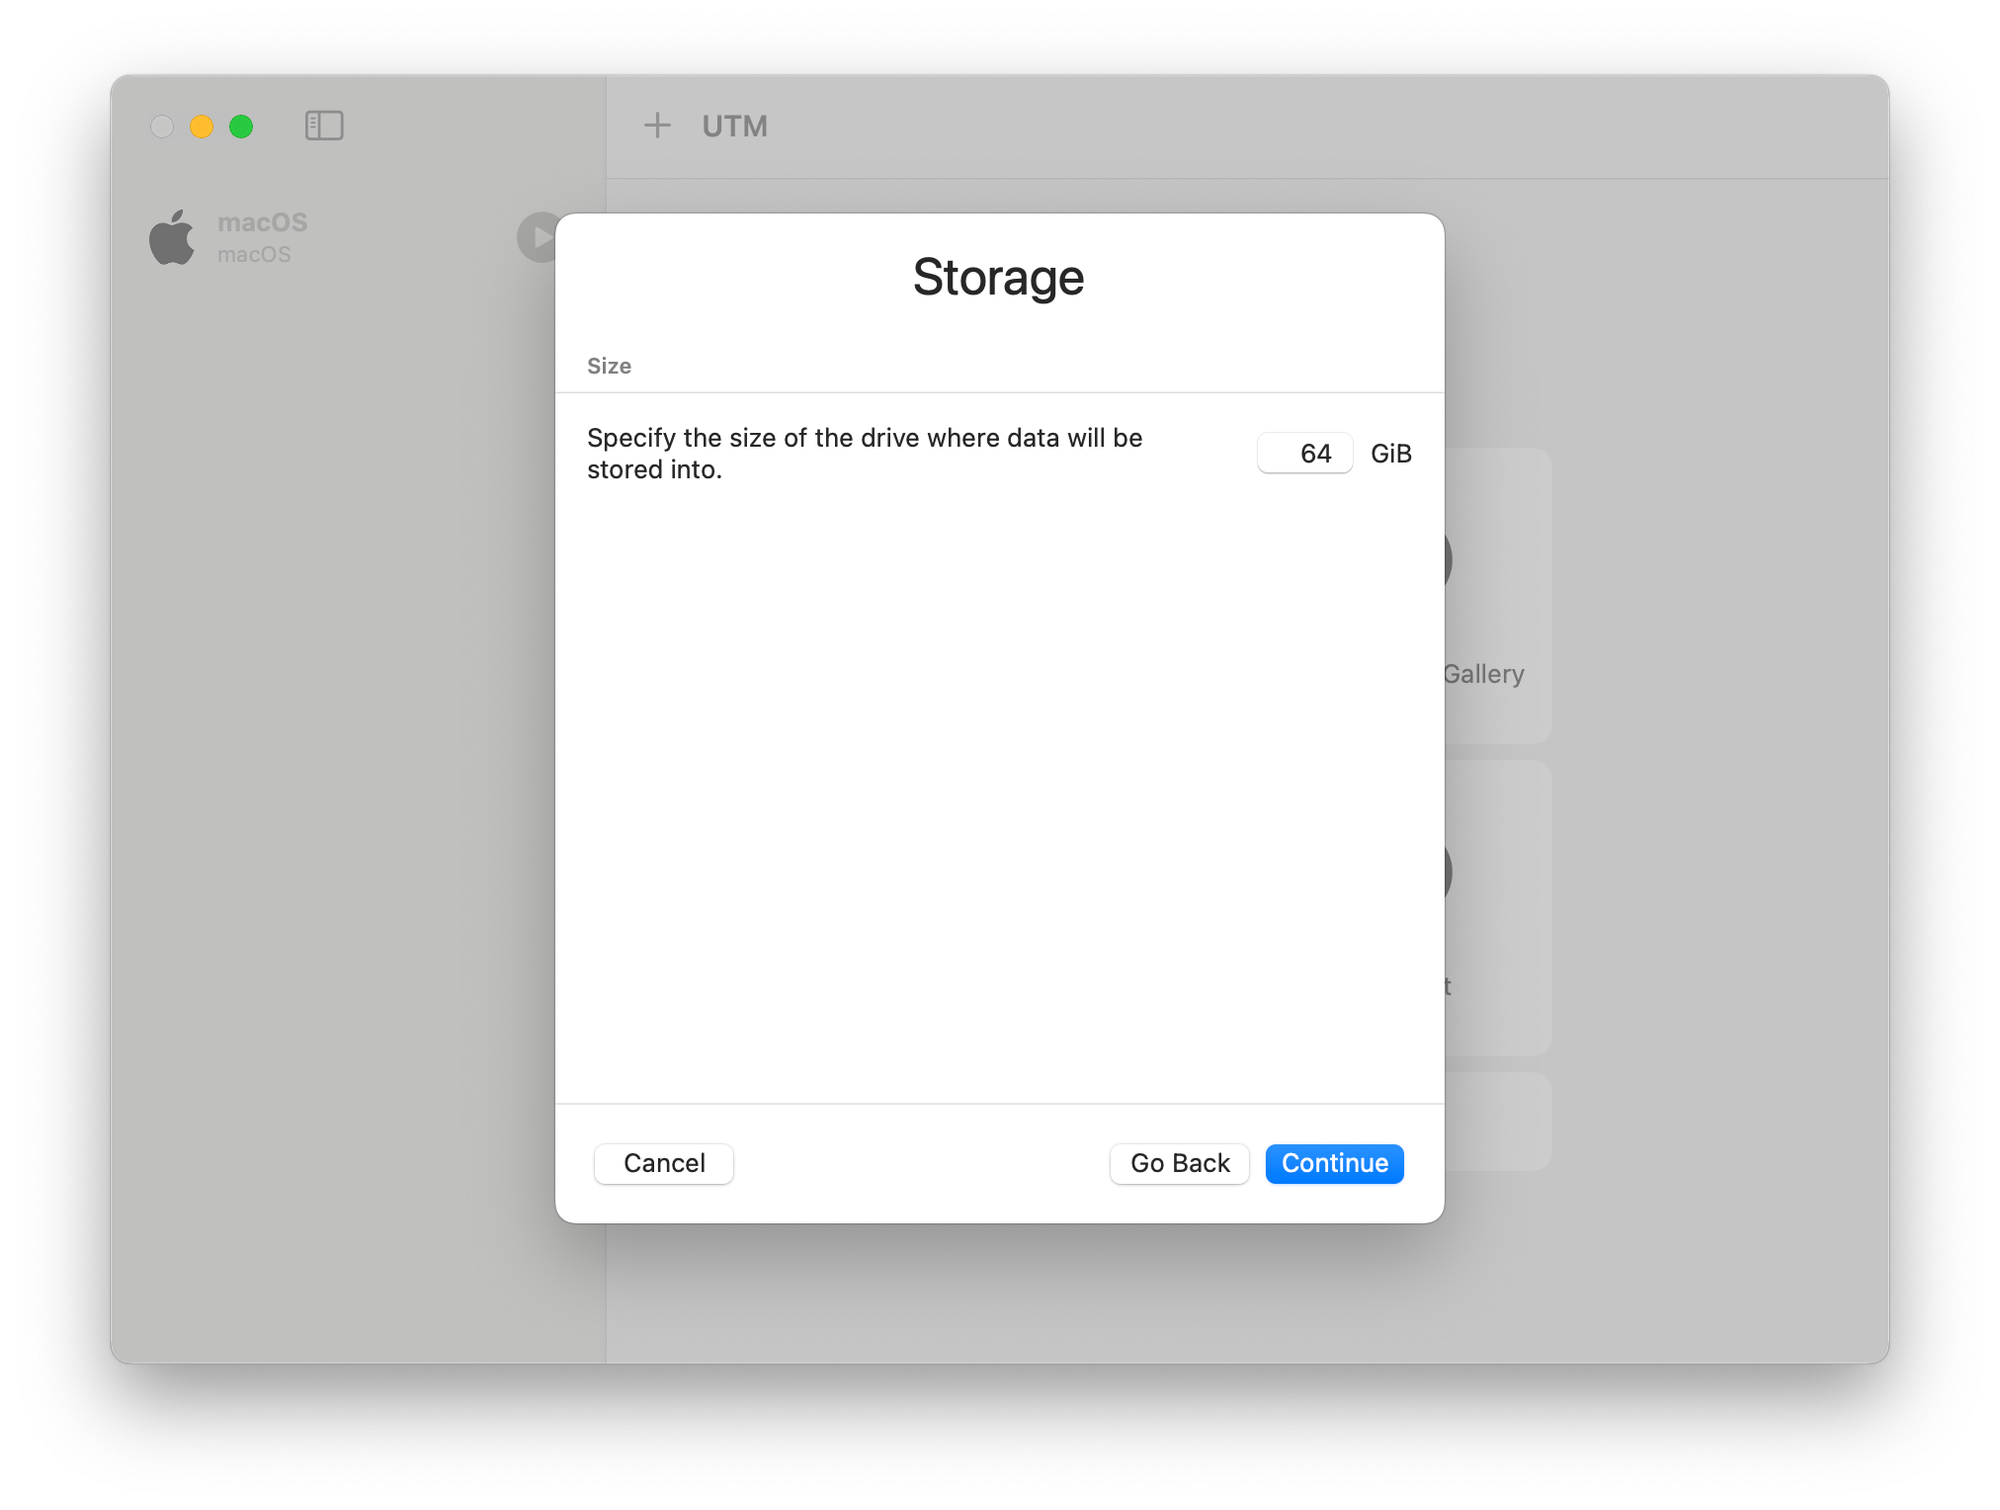
5. Set Disk Size
Specify how much storage to allocate.
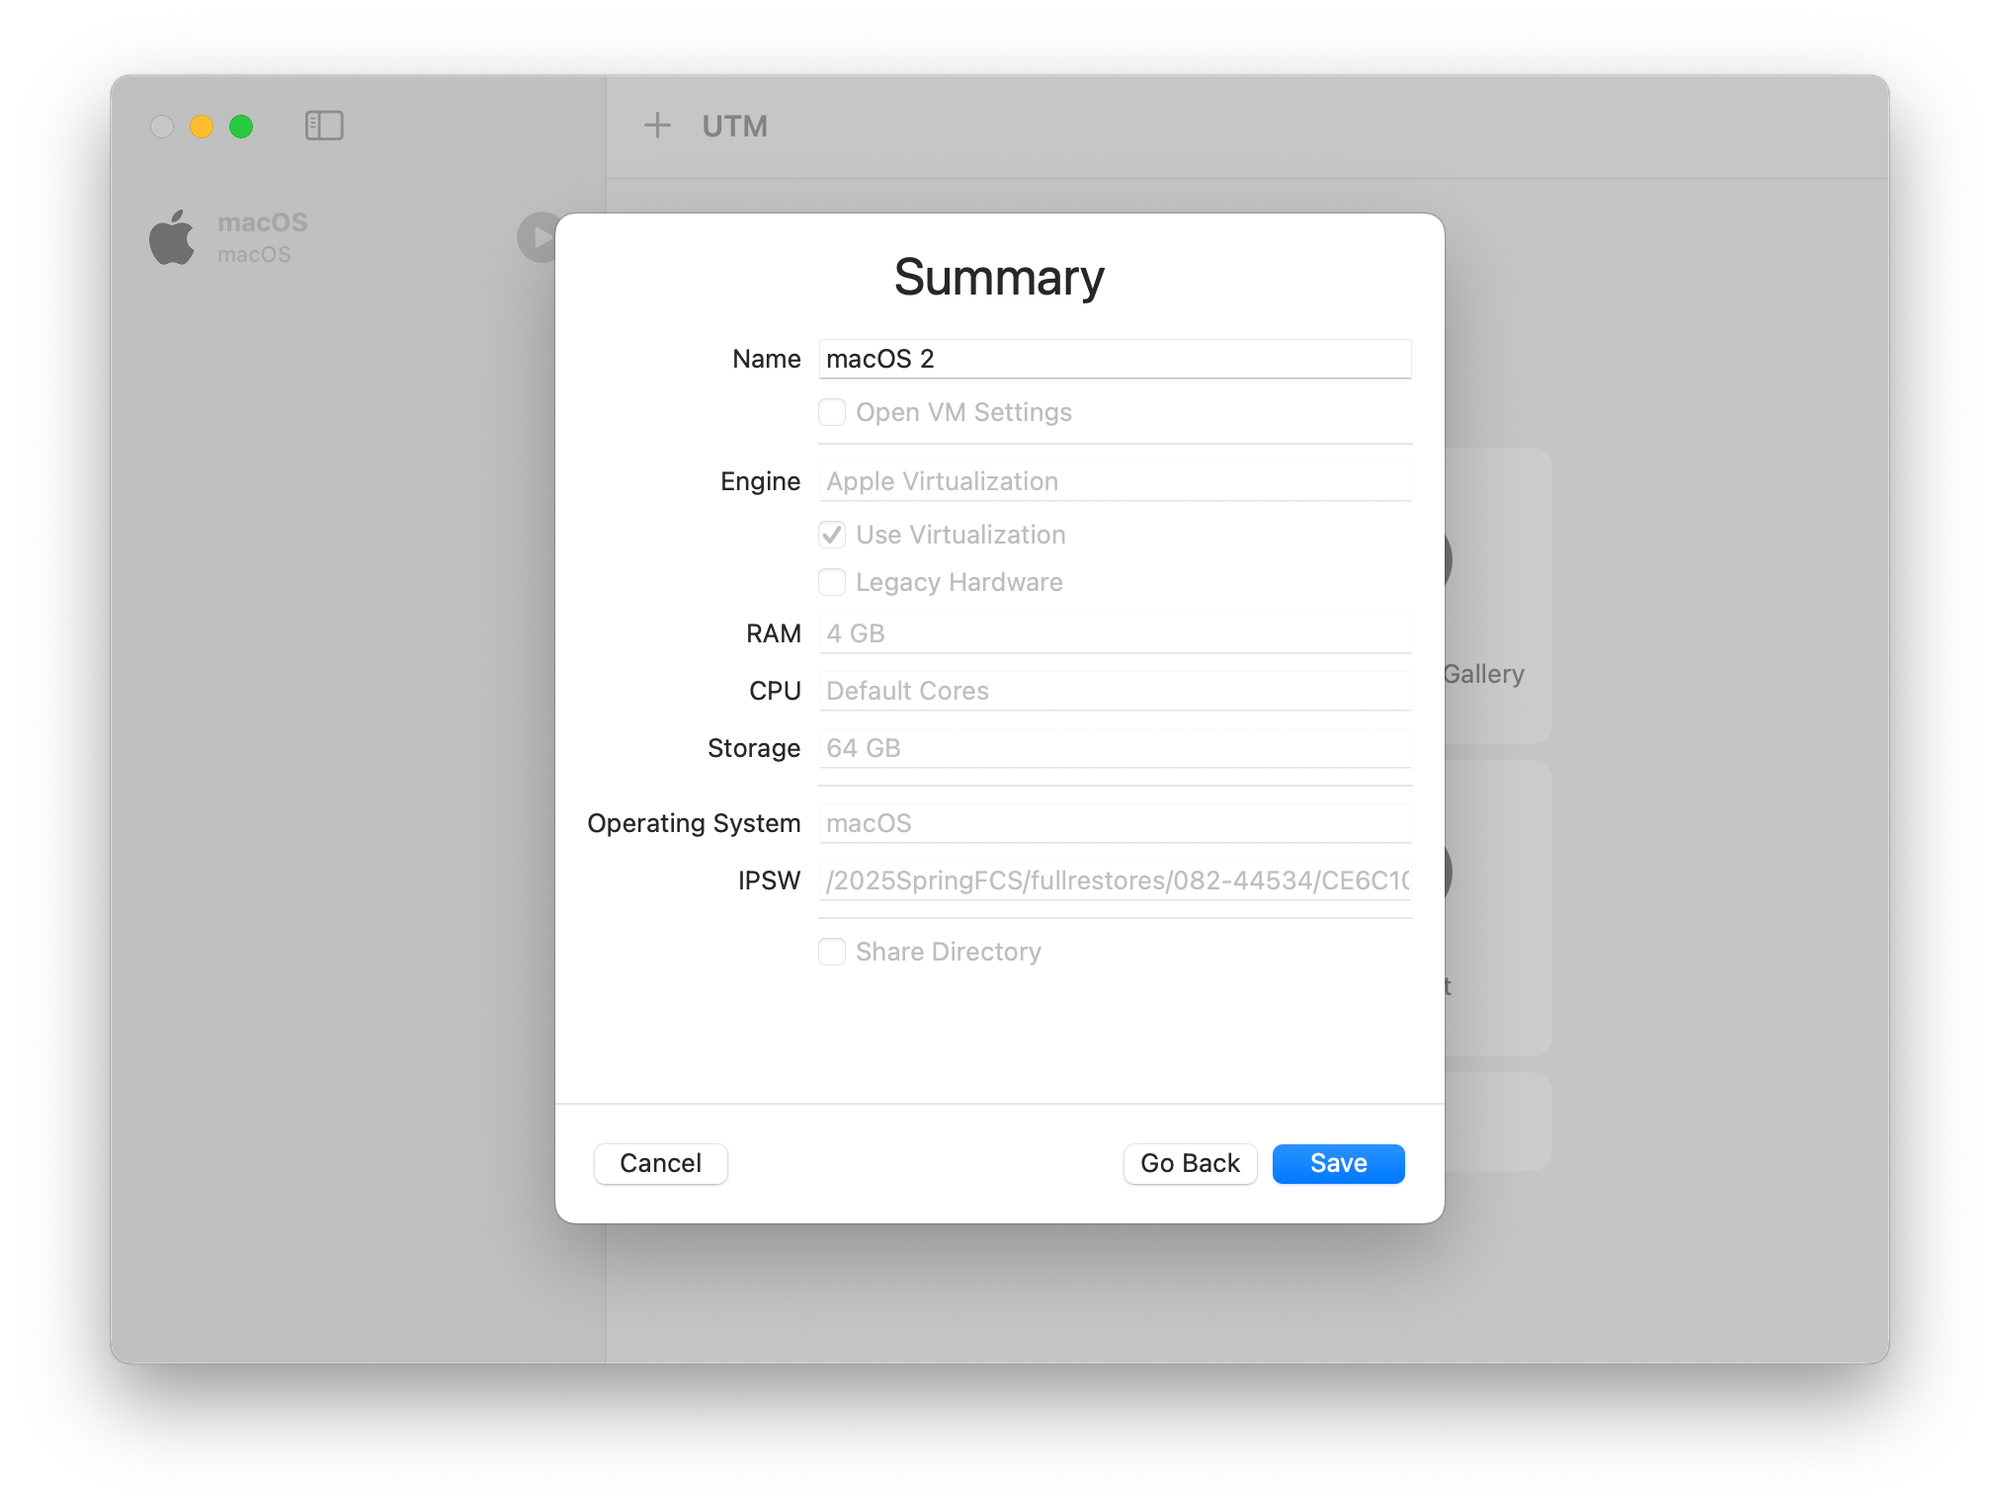
6. Summary Screen
Here’s where you review the configuration. You’ll see the engine (Apple Virtualization), storage size, RAM, and the path to the IPSW installer if one is selected. I recently had to have my Mac re-imaged at the Apple Store, so I’ve now get a much newer installer than the one it originally shipped with.
7. VM Appears in UTM
Once saved, your VM shows up in the sidebar. You can launch it any time from here. It will take a little time to install.
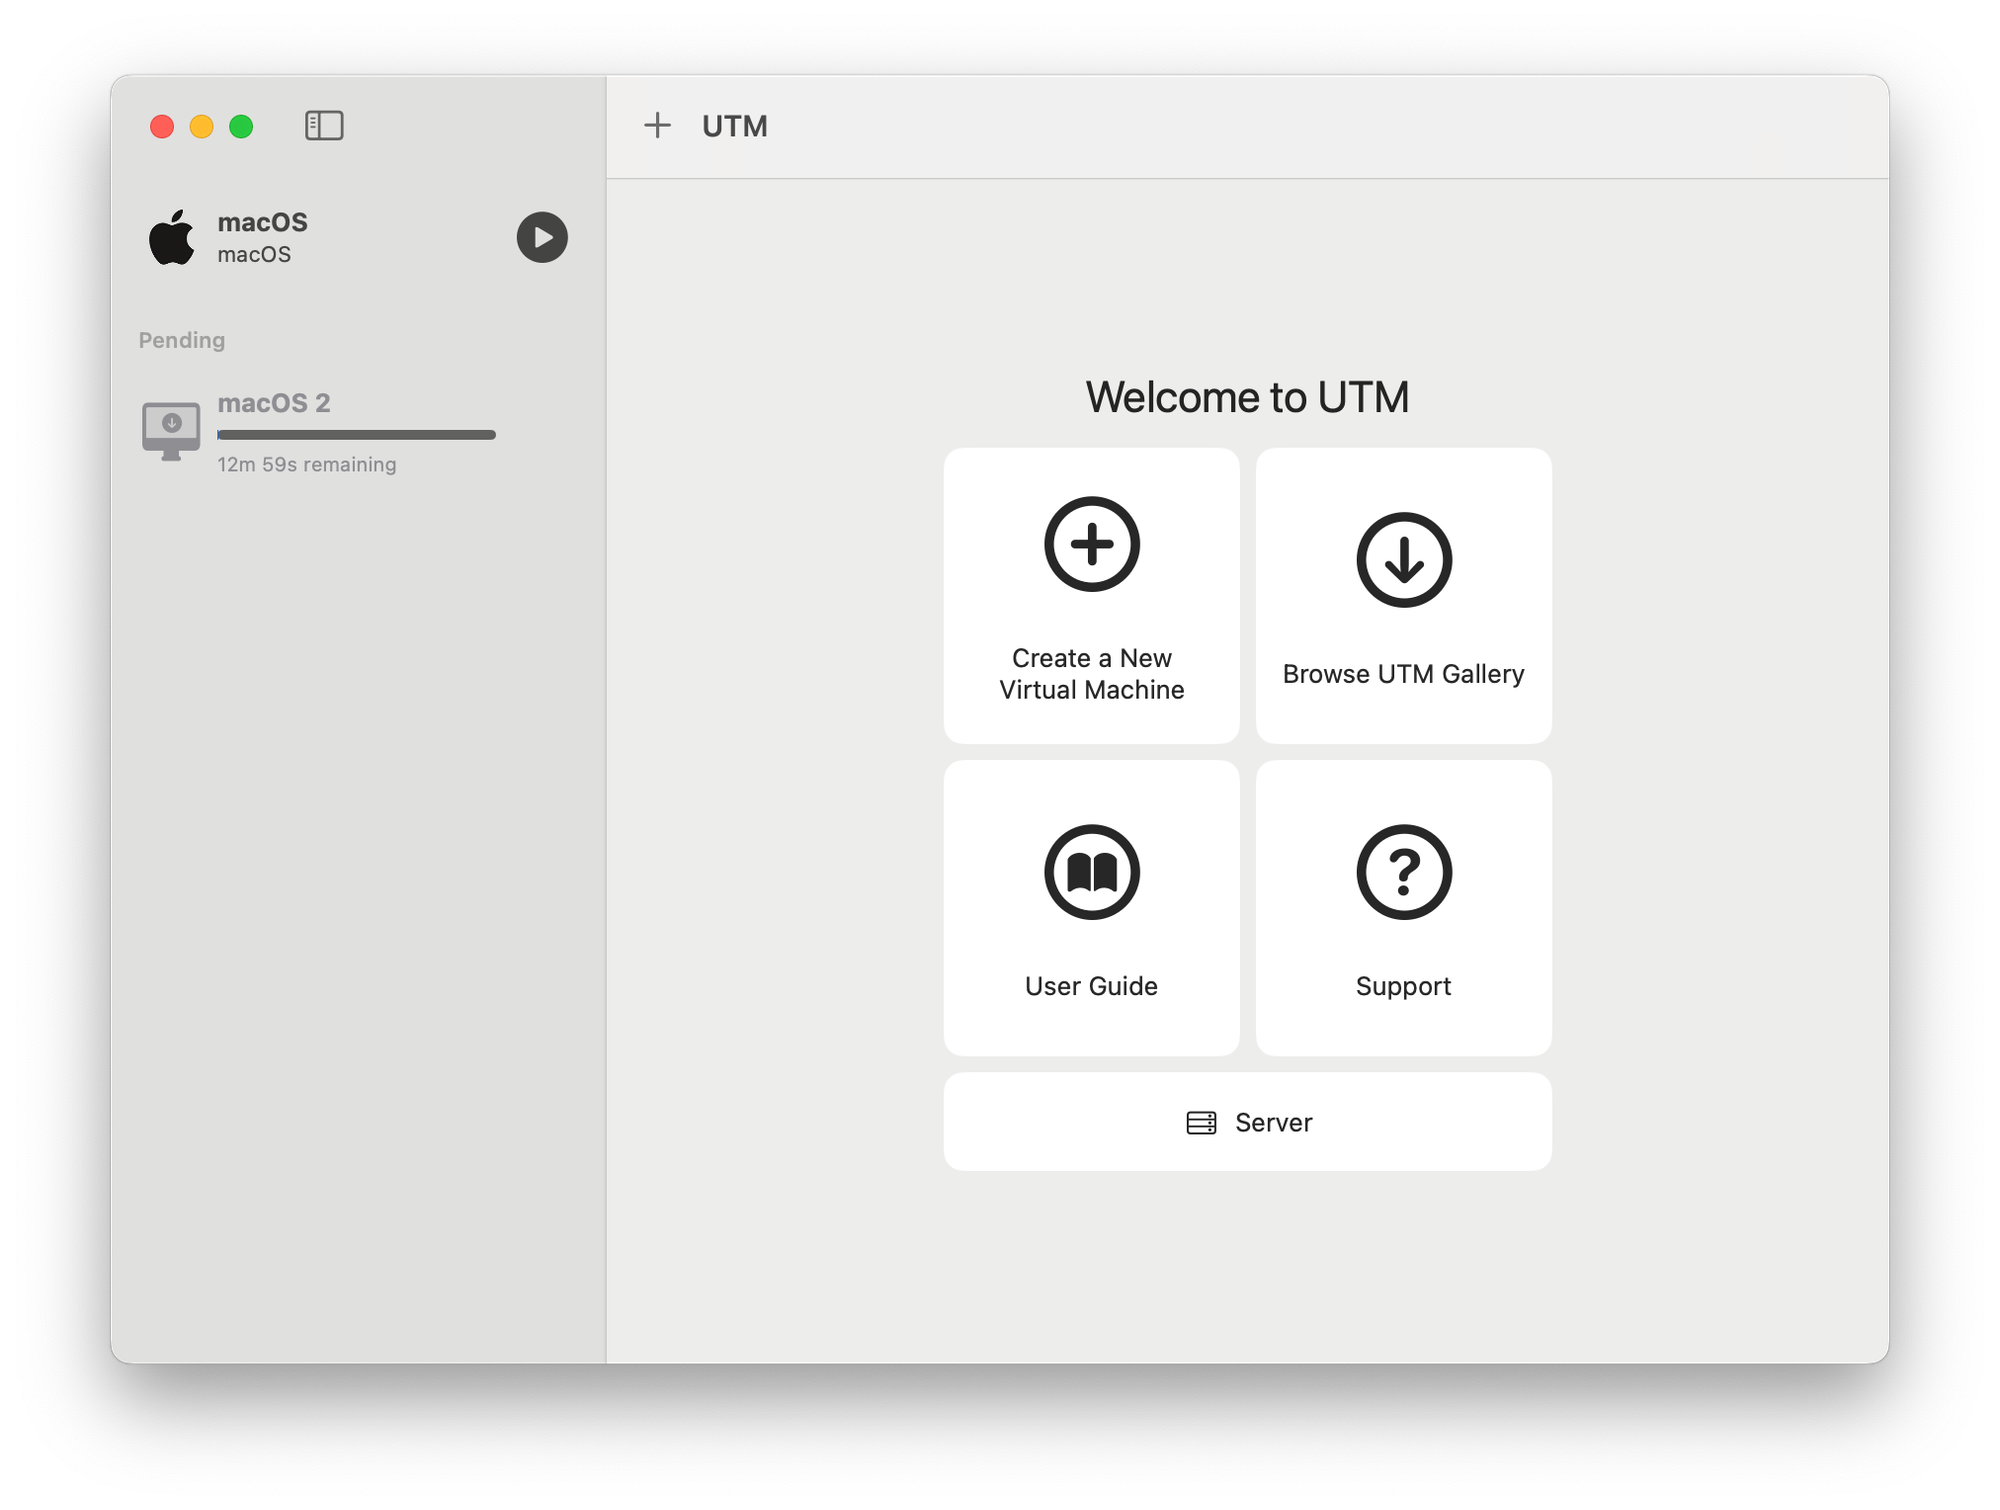
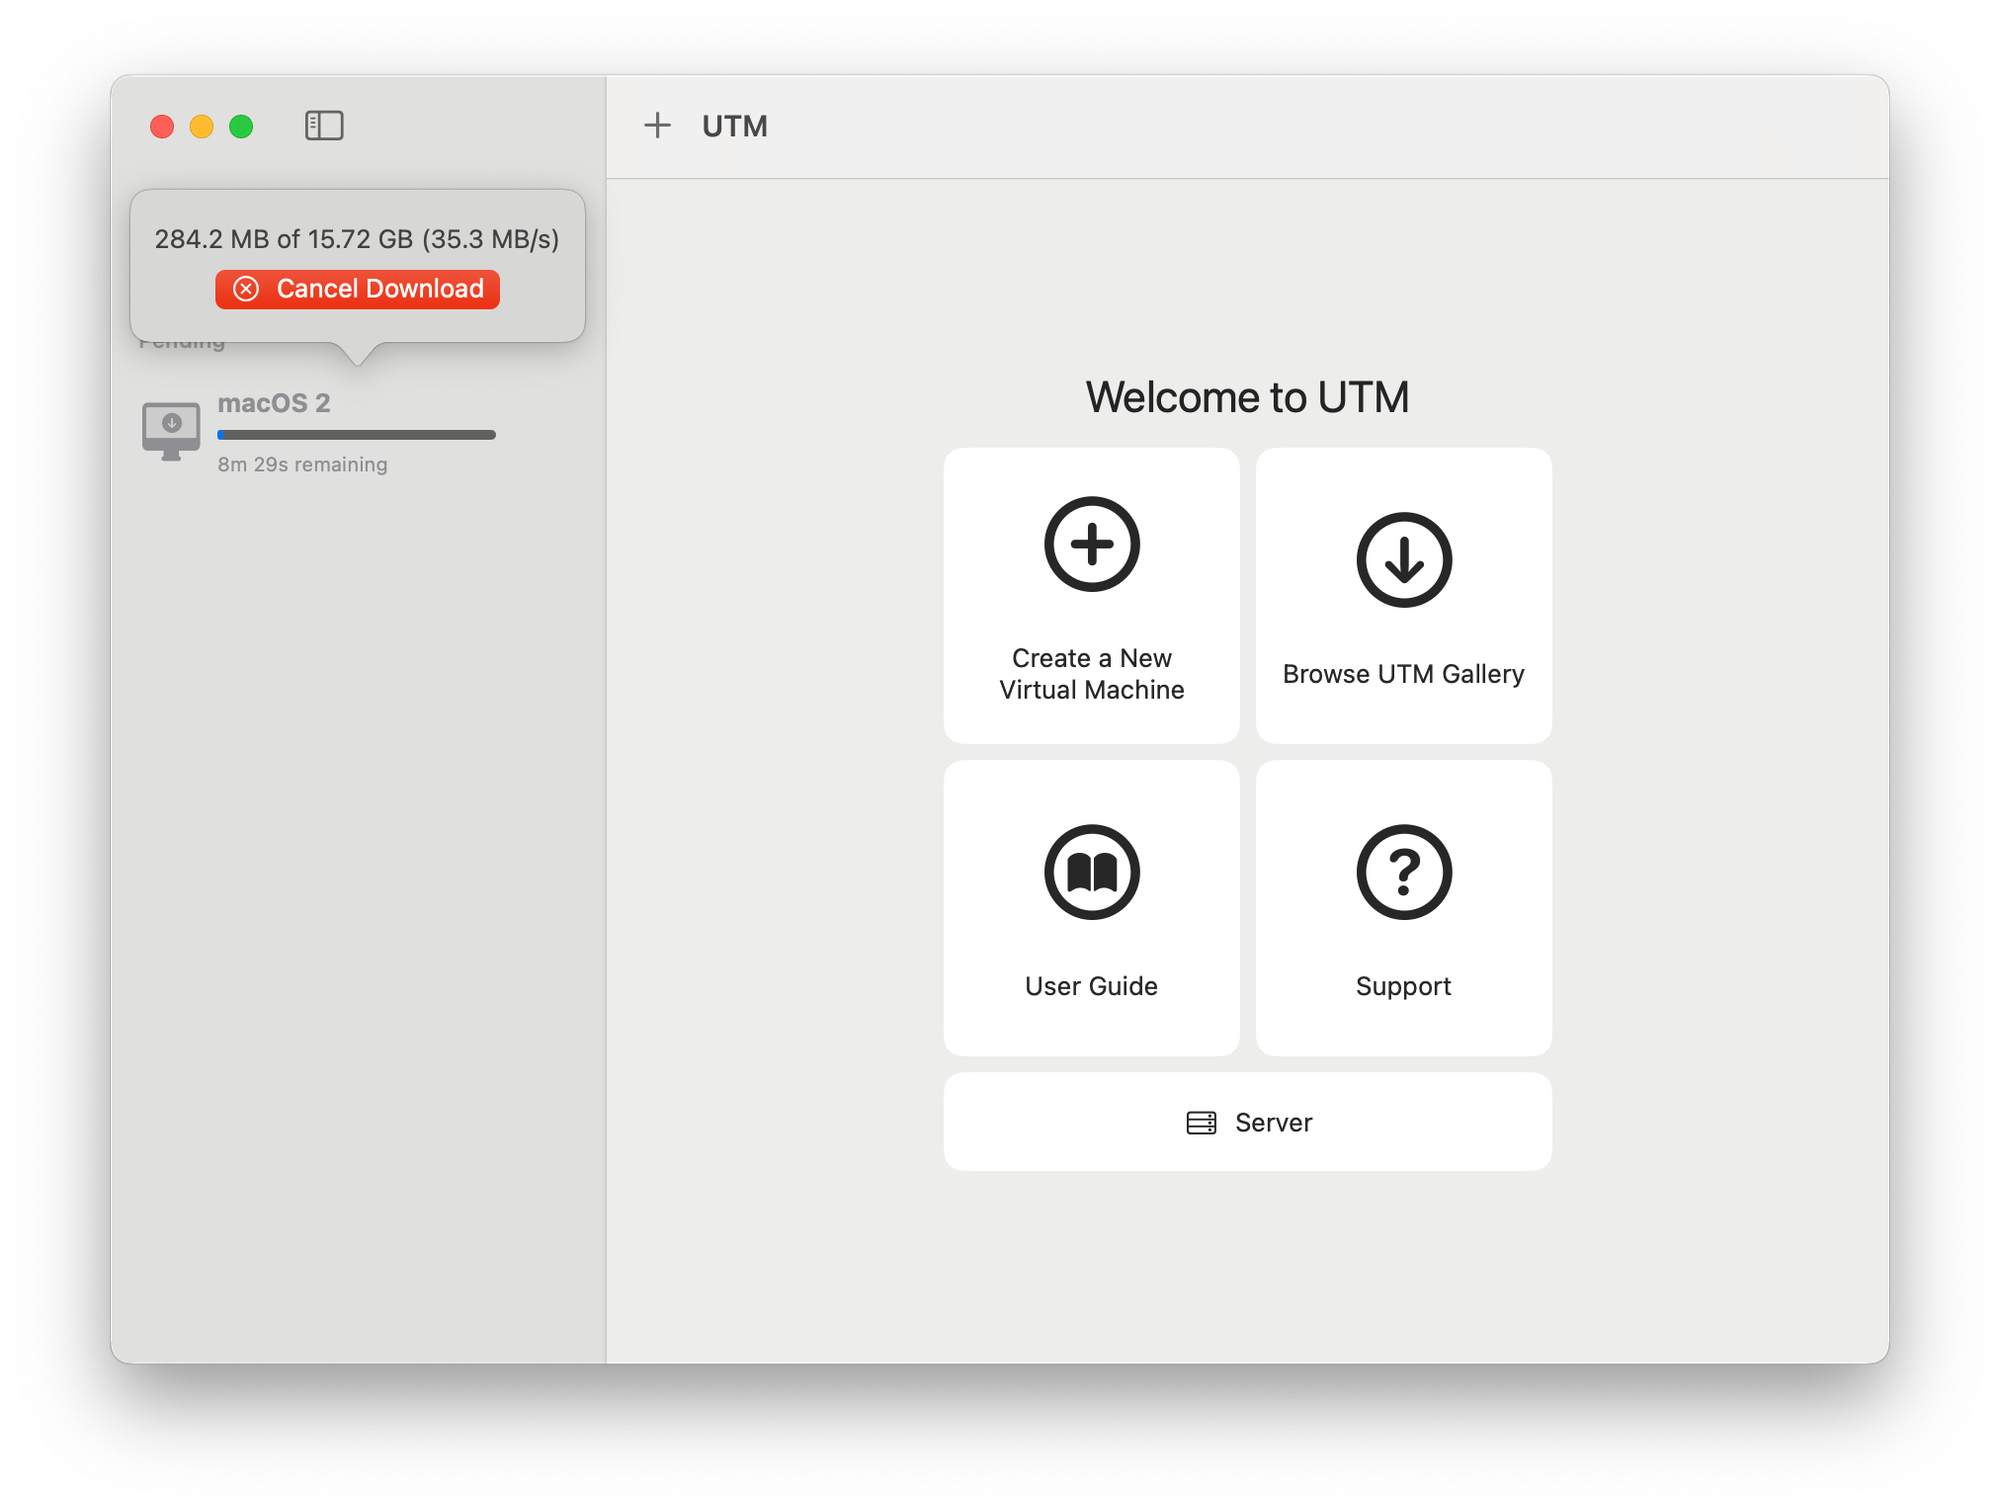
8. macOS Installer Downloading
If you skipped adding an IPSW earlier, UTM begins downloading it now. The terminology might say "downloading" but it’s really copying from the boot partition. You can cancel it at any time.
9. Launch the VM
Once the installer has fully copied over, your new macOS VM will appear in the left-hand sidebar. Just hit the play button to launch it.
10. macOS Boots in a New Window
The VM will start in a separate window. From here, you can go full screen and walk through the usual macOS setup process. Once it’s up and running, you’ve got an isolated, fast macOS environment to experiment with.
Although you can enable file sharing to share folders between the host and guest, direct drag-and-drop file transfer between windows is not supported. 😔

Enabling Beta Versions of macOS in Your VM
Want to run the latest macOS betas—like macOS 26 "Tahoe"—in your VM? Once you've completed the standard macOS installation and setup steps above, it's just a matter of opting into beta updates:
- Sign in to your Apple Developer account from within the VM:
- On the Mac inside the VM, go to Apple menu > System Settings.
- Click your name at the top of the sidebar.
- If you don’t see your name, click Sign in and enter your Apple Account email or phone number, then your password.
- Complete the process by clicking Sign in with Apple to authenticate your Developer account.
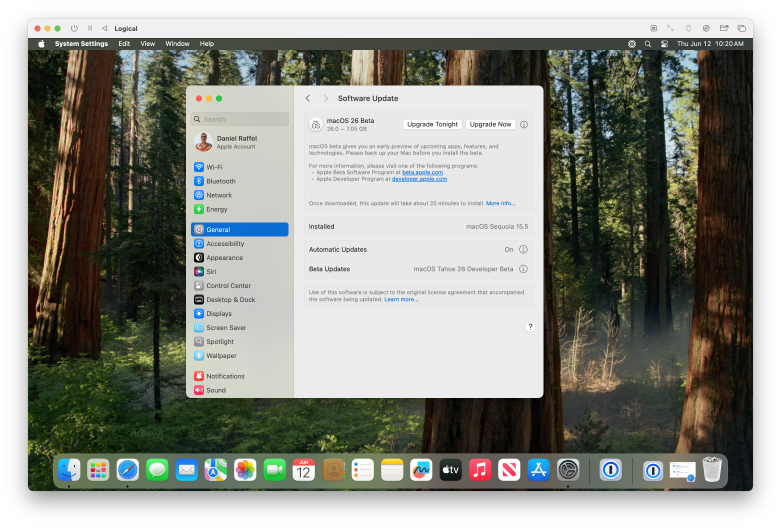
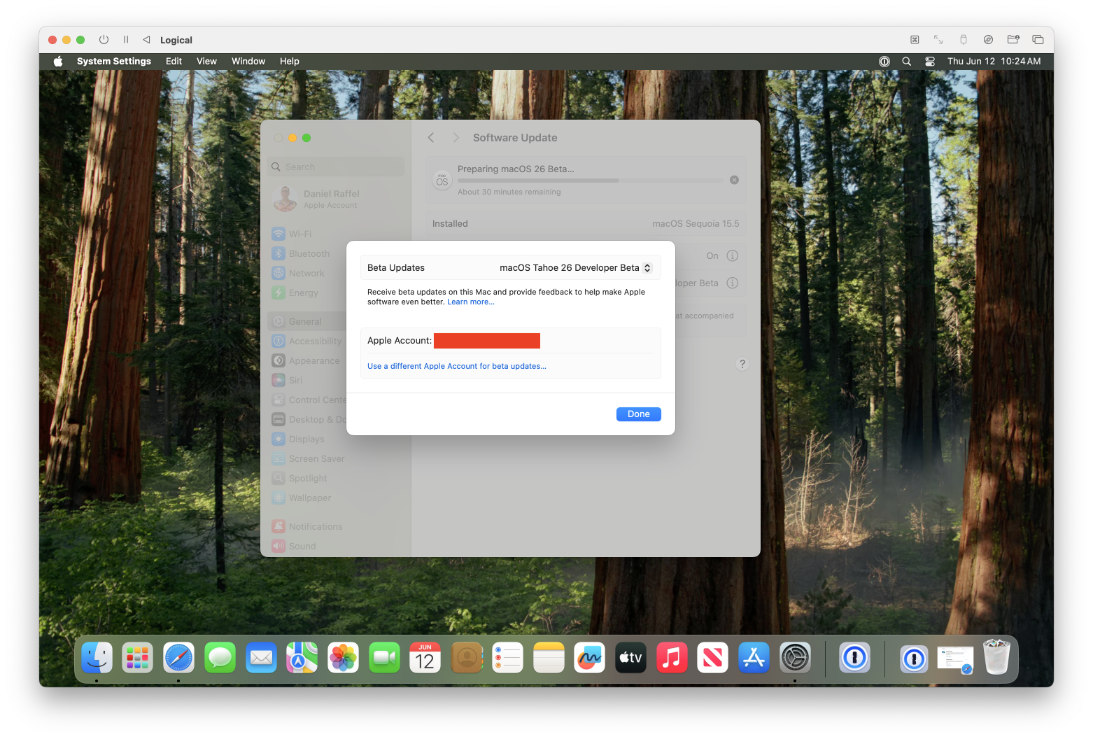
- Open System Settings > General > Software Update.
- Click Beta Updates and select macOS Developer Beta.
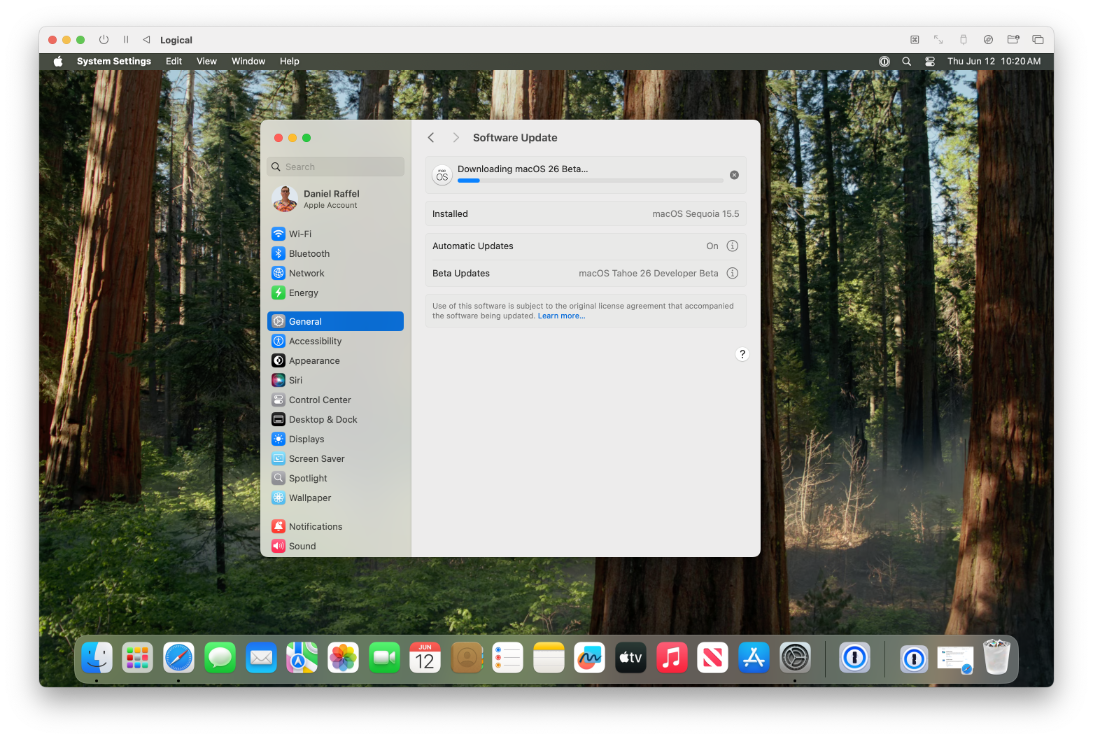
From there, the system will prompt you to download and install the latest available macOS beta. This is especially handy for developers working on macOS or iOS software who want to test against upcoming changes without risking their main environment.
✅ Note: This step is completely optional. If you're not working with beta software, you can skip it entirely and stick with the stable macOS release you originally installed. But, now you know how to run macOS 26 Tahoe Beta in a VM on Your Mac using UTM.
That’s it. Once the setup is done, you’ll have a fully functional macOS environment you can run in parallel to your main system. Useful for dev testing, isolating risky processes, or just giving agents a safe sandbox to play in.
Lessons Learned
Here are a few tips and workarounds that have made it easier to do Xcode development inside the client VM:
Apple prevents logging in to the App Store from virtualized VMs. If you need apps you’ve purchased, download them on the host and copy them over.When I first tried this, I hadn't signed in to my Apple Account under Apple Menu > System Settings. Once I did that, app downloads worked—classic oversight! 😅- Drag and drop doesn’t work. Setup shared folders in UTM. Just be thoughtful about what folders you share—if your goal is to sandbox AI tools safely, limit access on your host machine to only what’s absolutely necessary.
- Clipboard copying doesn’t work. I use an app called Clipboard Remote to transfer clipboard content between the host and the VM over the local network.
- Obviously, SSH keys don’t automatically carry over. Either copy them from your host machine (or generate scoped ones for the VM):
scp -rp ~/.ssh/* username@MACOS_UTM_CLIENT_IP:~/.ssh/- For Xcode and Command Line Tools on the client VM, I downloaded them via Apple’s developer site.
- c/ua looks like a promising alternative to hosting macOS in UTM, but it’s still early days—I’m not quite ready to recommend it just yet unless you're a developer.